If you have a previously archived Moodle course, or you need to move your course to a new Moodle server, restoring a course is the process to use to upload your zipped course files and view them. If you have not already downloaded a copy of your course, you will need to first to create a backup of that course. To review this process, see the article for Backing up a Moodle Course. For any help with restoring a course, contact the IT Helpdesk and the Moodle Team can assist!
How do I restore a course?
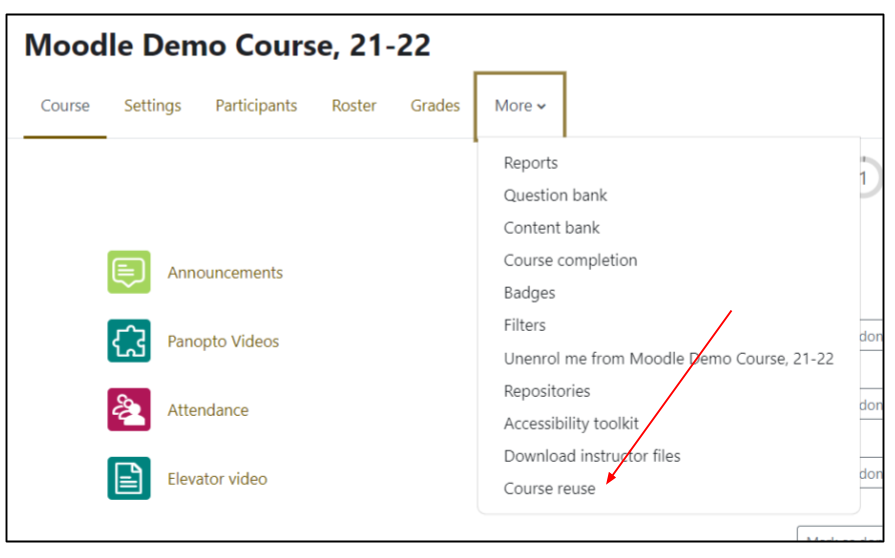
Once you have your downloaded backup file, go to the course where you want to import the backup (this can also be done from any of your current courses) and click on the More menu item below the course title and select Course reuse.
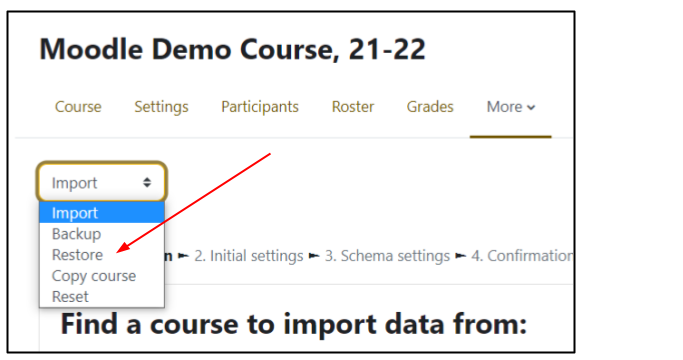
At the top of the page underneath the course menu you will see a drop-down menu showing the default value Import. Click on this menu and choose Restore and the window contents will refresh.
In the Restore course window, there are 2 methods to adding a file:

- Drag and drop box: After backing up a Moodle course, download the file to your local computer. Drag and drop this file to this box.
- User private backup area: When a course file has been backed up on the server you are working in , you can use this section to click Restore to automatically restore a file.
- Make sure to double check the Filename in this section to confirm that the correct file is being added.
On the Confirmation page, review that you are using the correct file.
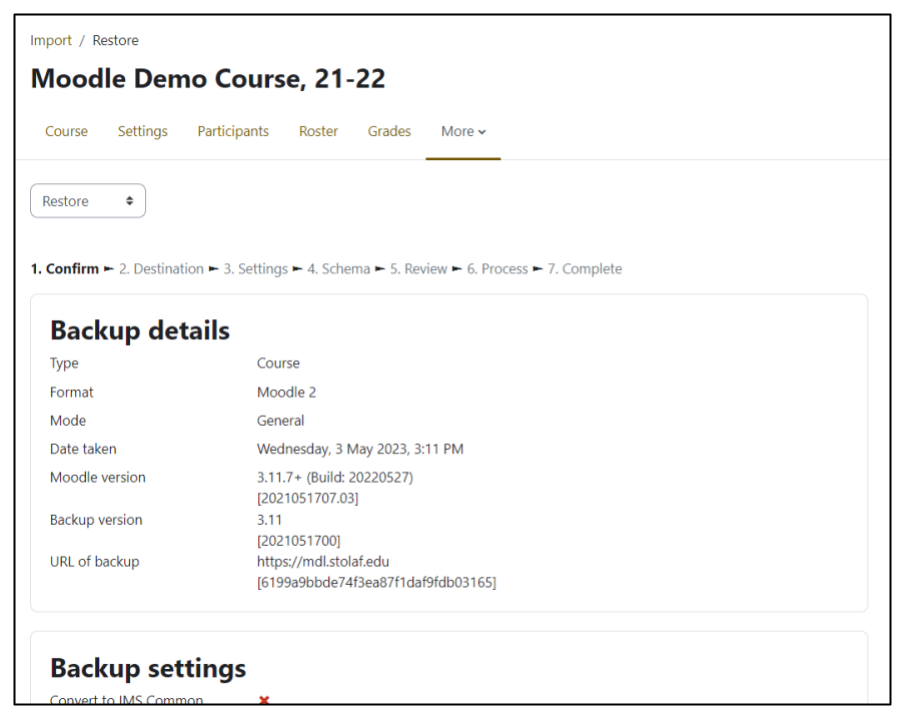
If everything appears as expected, scroll to the bottom and click Continue.
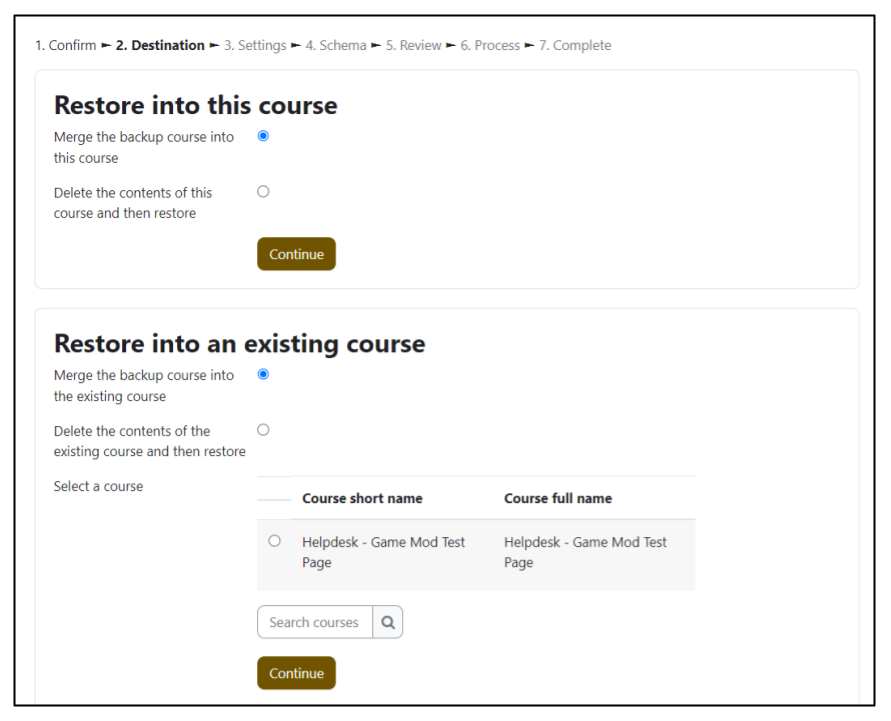
On the Destination page, if you initiated the restore from the target course, scroll down to the Restore into this course section. If you started in a different course, scroll down to Restore into this course section. and select your desired target course. You may need to search for your course if you have several on the server. It is recommended to always select Merge the backup course into the course in order to avoid accidentally deleting any current content. If the page is empty, it is still recommended to use this option, unless you are certain that you wish to erase any current content and that you have chosen the correct course. ,Any materials that are not needed can be removed manually after the restore.
After selecting the import method and target, click on Continue below your chosen section options.
In the next window, confirm that there is red X for Include enrolled users. No users should be restored with the course materials.
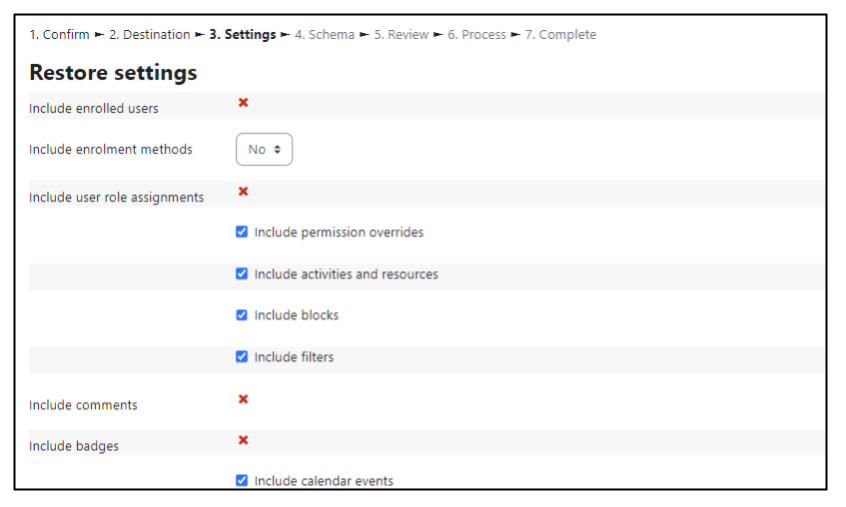
Review the remaining details and click Next.
In the next window, you may choose to exclude individual resource by unchecking the boxes next to them to remove them from the restore. Individual items can always be hidden or deleted at a later date if they are not needed later on. If you wish to only include one or two items of many in a section, you can first click on the checked arrow next to the section to deselect all items in that section, and then recheck the box to allow you to check individual items in that section.

Click Next and in the next window, review your settings and click Perform Restore. Moodle will add the course materials to the page and display a confirmation page once it is finished. For larger courses, this could take a few minutes.
Any questions or issues with restoring a course?
Contact the Moodle Team for questions! In order to improve the Moodle user experience, there are size limitations that you may encounter while trying to restore a course. We would be glad to help with any questions regarding course organization in order to streamline this process.