When the Ally plugin is active in your course, you will see two icons after each uploaded file that Ally can assess. The first of these is a colored meter icon that provides an accessibility score for uploaded files such as PDFs, PPTs, and DOC files. This score is represented by the color of the icon (red = low, orange = medium, green = high) and the by the position of the arrow indicator in the meter (left side = low, middle/up = medium, right side = high) which indicate the level of compliance with accessibility standards.

Clicking on this meter icon will take you to an accessibility report for the file, where you can see specific information on the issues found and suggestions for how to resolve them.
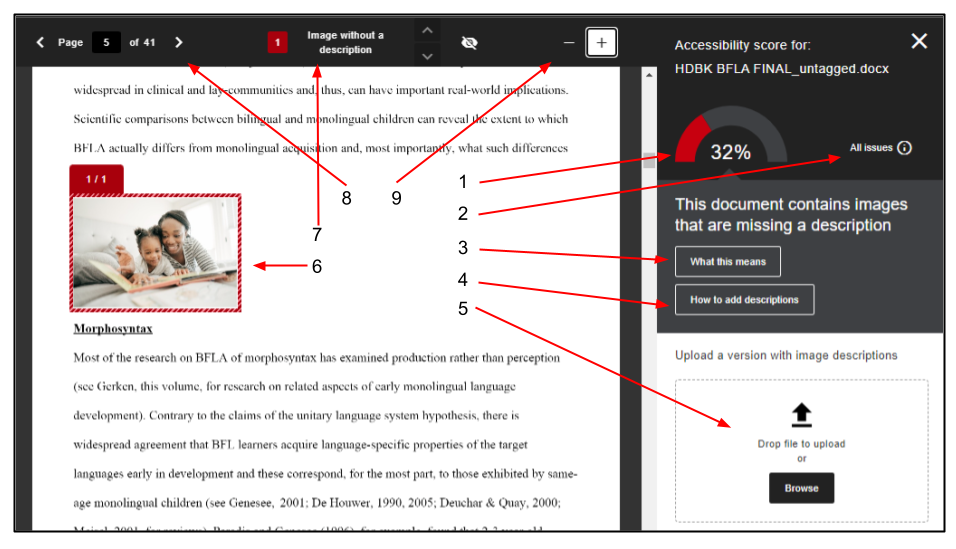
The accessibility page for an individual file features a meter in form of an arc, with the same red, orange, green scheme as the main page icon, along with a percentage score for the file [1]. Ally will highlight the most serious issue first, as determined by the increase in score possible by resolving the issue. The type of issue will be identified, and the first instance of the issue will be highlighted in the document preview [6]. You may scroll through any further instances of the issue using the navigation at the top center of the page [7].
You can switch to see all issues identified by clicking on All issues [2]. This will list each type of issue identified in the file, and clicking on any one will allow you to view all instances of that issue. For each issue identified, you will see the name of the issue, with a buttons allowing you to see What this means [3] and how to resolve the issue [4]. Clicking on What this means will take you to a detailed description of the issue and how it affects accessibility. While not every issue will have directions for resolving it, most will display a How to... button which will direct you to a step-by-step interactive instruction on how to resolve this issue in your particular environment (dependent on which software/software version was used to create the file, for instance).
Once improvements have been made, you can simply drag-and-drop the modified file onto the page or click on the Browse button to locate and select the file [5] to replace the file in your Moodle site. After doing so, and waiting for the file to be uploaded and re-analyzed, you will see a new accessibility score, hopefully indicating a higher score.
In addition to a scrolling slider, the page also includes navigation aids to move through the document page by page [8] and to zoom in and out on the content [9]. When you are done with the report page, clicking on the X in the upper right corner will return you to the Moodle page. You may need to refresh the page to see any improved accessibility score represented in the icon on the main page.