The Moodle Attendance activity allows you to set up an attendance tracker that you can either fill out as the instructor of the course, or allow students to self-mark. Attendance can either be used simply as a tracker, or can actually create a grade that is entered into the Moodle gradebook.
Creating the activity
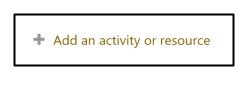
- To begin the process, select Add and activity or resource from the section where you wish to create the activity (generally in the first course overview section).
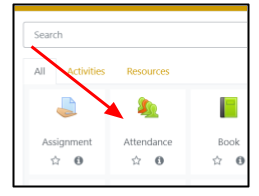
- Select Attendance from the activity chooser.
- From this page, you only need to Name the attendance activity and decide, under Grade, if the activity will be graded or not (select Type:None), and if so, in which category it should be and how many points it is worth.
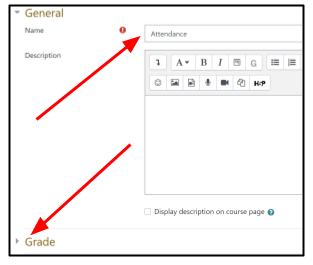
- After naming and deciding on grading settings, click Save and display.
Setting up the Attendance Activity
Once you have created the activity, you will need to set up Sessions or class periods, and determine the settings.
Attendance Status
The attendance activity is by default set up with four attendance statuses: Present, Late, Excused, and Absent. Each status has a point value associated with it for grading purposes, and a setting for student marking that indicates how long after the beginning of class students may choose that status, if student marking is set.
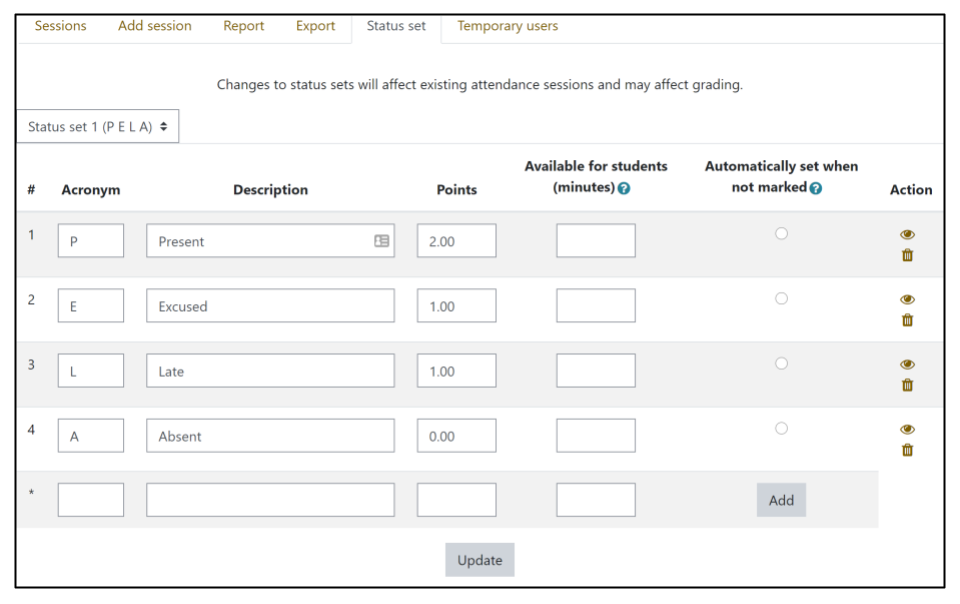
These preset values may be modified, deleted, or added to from the Status set tab. Adding a status requires an acronym that will appear in the grader, the name/description and a point value. Note: after adding a status, the Available for students (minutes) field may automatically be set to 0. A 0 value in this field will render it unavailable to students, so be sure to either delete or add a time and Update.
These values will apply to all sessions in the activity, and may be altered after sessions are created. Doing so will apply the new criteria to all sessions.
Creating Sessions/Class Meetings
Initially, you will not see any sessions listed under the Sessions tab, you must first create the class meetings in the Add session tab.
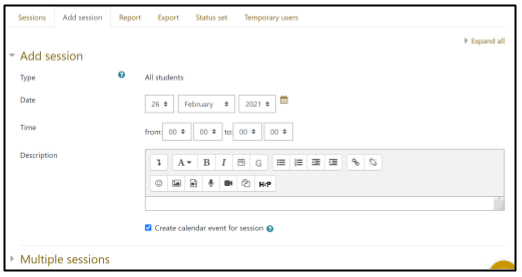
From this tab, you may create either a one-time meeting or (more typically) a recurring meeting time for your course. If you have a metacourse, or a course with groups who have different meeting times, you will be able to select which group the current session(s) will apply to in the drop-down menu at the top of the page.
-
Begin by select the (first) Date of your meeting, and importantly, the Time for the meeting. If the default 00:00 is kept for both from: and to:, students will not be able to mark their attendance. Sessions are confined to a single day, and so 00:00 to 23:59 is the largest span you can set for students to check in for an asynchronous session.
-
You may optionally describe the meeting under Description
-
For recurring meeting sessions, expand the Multiple sessions section of the page and choose the days for the meeting to Repeat on and to Repeat every how many weeks (generally 1). Finally, choose the end date that it should Repeat until.

-
To allow students to mark their own attendance, expand Student recording and check the box next to Allow students to record own attendance. If you choose this, you may still mark students, and override their marking. You may also choose to enable Automatic marking, which will give the student the highest possible mark, based on the time they access the activity. Leaving this disabled will allow them to manually choose their status. You may also require a password for student to mark their attendance.

Marking Student Attendance
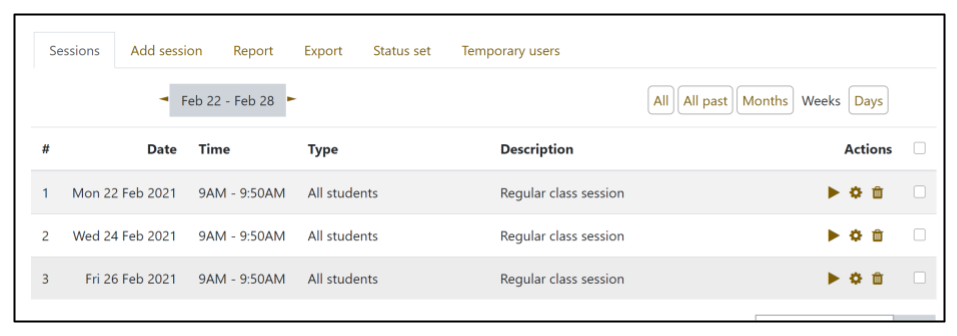
Once your sessions have been created, or when you return to the activity by clicking on the link from the main course page, you will see all of the class sessions created. Each session has options on the right side of the page to mark (the play triangle), edit, or delete the session. The list also includes a check mark next to each session, allowing you to either delete or change the length of class sessions in bulk.
Marking Status as a Teacher
Clicking on the “play” triangle will take you to the marking interface you see below. You can manually mark individual students and leave optional remarks, or you can choose to set status in bulk, choosing either to assign the status (by clicking on the letter above the columns) to all students, or only to those with no status set.

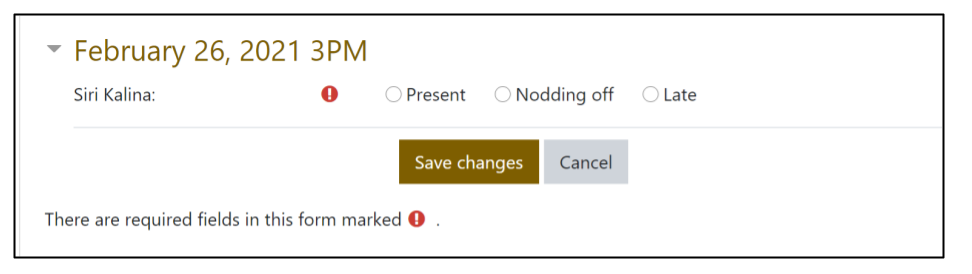
Marking Status as a Student
Students will see a screen like the one below, with the Submit attendance link only available during the time specified for each session.

If automatic marking has not been enabled, then they will see a screen presenting them with the options for choosing their status. If Automatically choose highest status available has been chosen in the setup, students will simply see the Submit attendance link change to reflect their status and points, with Self-recorded in the Remarks column.
Self-recorded marks can be overridden by the teacher at any time.
Viewing/Downloading Attendance Reports
Clicking on the Report tab will show a tabular report of attendance for all class sessions, with a summary of the number of sessions marked, points received and overall percentage earned for the activity (which would also be reflected the gradebook, if grading was set).

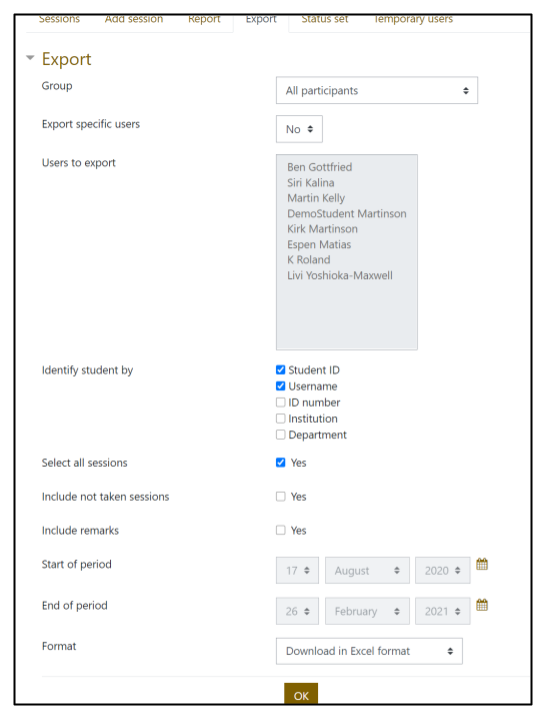
Selecting the Export tab will bring up a screen allowing you to select which groups or individual students to create a report for. You may also set which student information should be included in the report, as well as whether only completed or all sessions are included, and whether remarks are exported as well. You may also indicate a range of dates to report. After choosing the settings for the report and the format, Selecting the OK button will download the specified report.