VLC (VideoLAN Client) from VideoLAN is one of the most widely used open-source, free software for viewing videos. However, VLC does not natively play Blu-ray discs without additional software. This article will step you through the installation of two additional pieces of software to provide for fully functional Blu-ray playback with VLC.
Installing VLC media player
If you do not already have VLC media player installed, you can access the free download from VLC's website at www.videolan.org/vlc/. VLC should automatically present you with the appropriate download link for your operating system. Download and double-click the installation file and follow the instructions to complete the installation.
Installing and setting up MakeMKV
VLC will play normal DVDs by choosing Open Disc from the File menu, but even if you check the Blu-ray option, you will encounter an error stating the need for a specific converter. This can be accomplished by downloading and installing MakeMKV, a converter application that is currently free while in beta production.

- Download the application and double-click to install, following the installation prompts.
- Open MakeMKV (Windows users may need to open it from its installation folder, by default: C:\Program Files (x86)\MakeMKV\makemkv.exe)
- From the program menu, select View and Preferences
- Select the Integration tab and click the box next to VLC and click OK.
MakeMKV is now setup to transcode Blu-ray video in VLC.
Installing Java for Blu-ray menus
Simply installing and configuring MakeMKV will allow VLC to play your Blu-ray discs, but you will receive an error message that menus will not be available if you have not installed Java on your computer. Installing and configuring Java will give you full playback of your Blu-ray discs.
Download and install Java

- Visit Java's website to download the appropriate Java package for your computer.
- Double-click the downloaded file to start the installation.
- Check the box next to Change destination folder and then click Install.
- In the next window, note or copy and past the path under Install to: for use after the installation completes.
- Click Next to complete the installation.
Set your Environment variable path for Java
To ensure that your applications have access to Java, it is necessary for Windows users (and some Mac OS users) to set the path to the Java application so that other programs can access it. This is required for all Windows installations, and should only be necessary for Mac OS users if menus still don't display correctly in VLC after Java installation.
Setting the Environment variable in Windows
- Click on the Windows or search icon in the taskbar, and type in Environment.
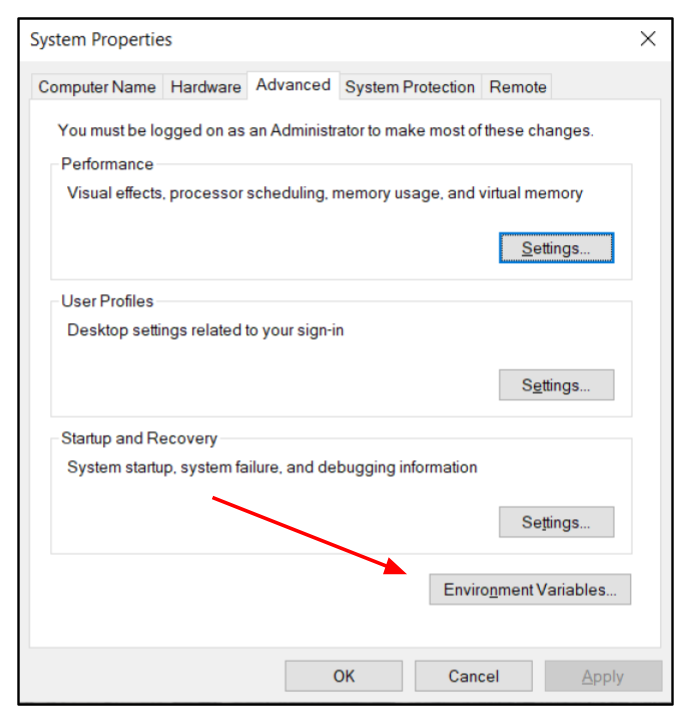
- Select Edit the system environment variables.
- Click on the Environment Variables... button at the bottom of the Advanced tab.
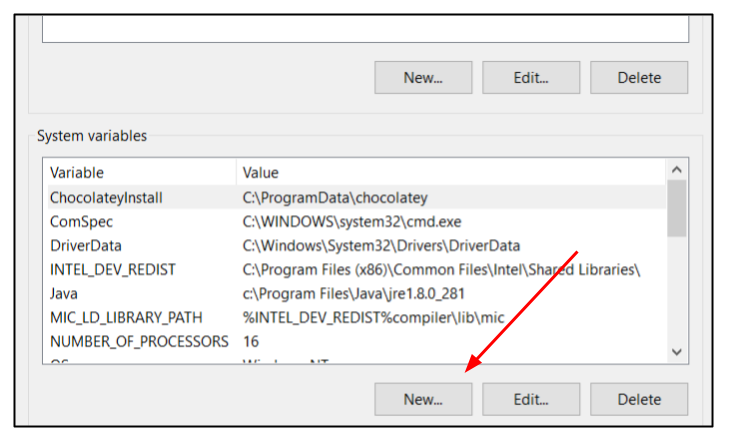
- Under the lower box titled System variables, click on New...
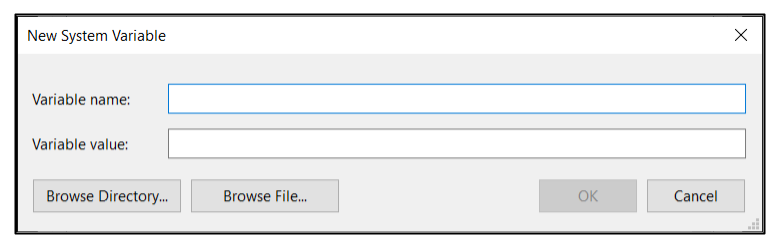
- In the Variable name: field, enter Java_home.
- In the Variable value: field, enter the path you noted, or copied during Java installation above.
- Click OK to close the window, and then OK again to save the new value.
Setting the Environment variable in Mac OS
If your Java installation isn't automatically found when running VLC, you can do the following to set the path.
- Open up a Terminal window from Apps -> Utilities.
- Type in the following: emacs .profile
- Add the following lines to the end of the .profile file:
- JAVA_HOME=/Library/Java/Home
export JAVA_HOME;
- Save and exit emas (with ctrl-x, ctrl-s)
Playing a Blu-ray disc with VLC
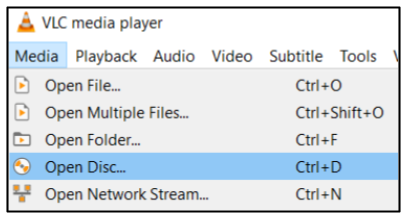
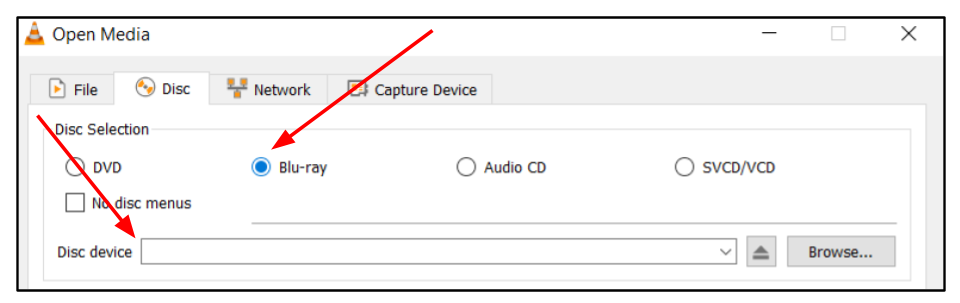
- After installing MakeMKV and Java, open up your installation of VLC, and select Media -> Open Disc.
- In the Disc tab, select the radio button next to Blu-ray and verify that your Blu-ray disc is listed in the field following Disc device. (If not, you may need to choose Browse... and locate your Blu-ray disc drive)
- Enjoy your Blu-ray disc!
Note: If you receive the following message about region settings: Mismatch between disc and player region codes, you will need to take the following steps to make sure your copy of VLC is set to read menus from the correct region.
- From the VLC menu, choose Tools -> Preferences.
- At the bottom select All from Show settings.
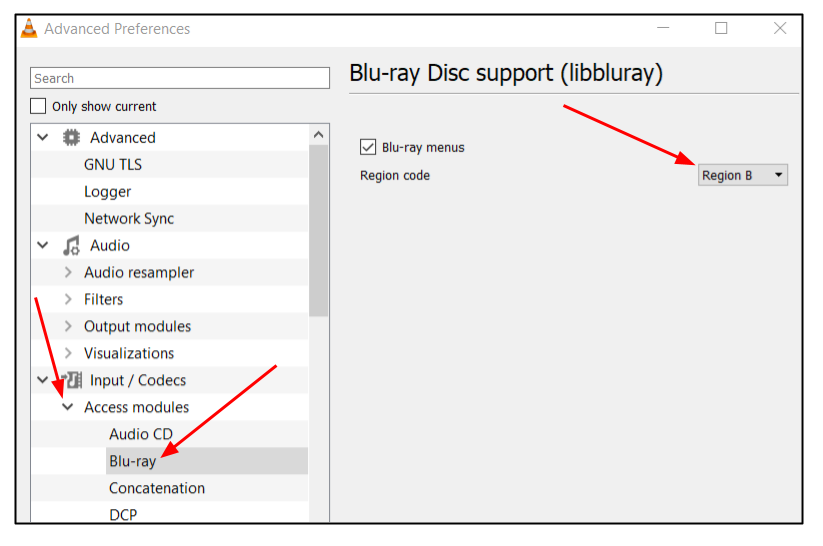
- Under Input / Codecs click on the arrow next to Access modules to expand the list
- Click on Blu-ray and in the drop-down next to Region code change the region to match your disc (generally Region A).
- Select Save and try your Blu-ray disc again.
Integration:
Copy dlls?
Downloading Java:
https://www.java.com/en/download/manual.jsp
Setting Java for menus:
https://confluence.atlassian.com/doc/setting-the-java_home-variable-in-windows-8895.html
Blu-Ray Mismatch problem:
https://echoshare.co/how-to-play-blu-ray-on-vlc/#:~:text=When%20you%20see%20%E2%80%9CMismatch%20between,play%20the%20disc%20for%20you.