Body
When adding content anywhere the text editor is present, there are extra formatting options when managing content. One of these is interactive tabs, which can be used to organize materials and make it easier to navigate the Moodle page.
The tabs can be added anywhere you are presented with the text editor for adding and formatting text. Tabs are added in the editor as coded tags that surround the content for each tab. Tabs are created with the tag format shown below, and there are two ways to have the editor create these tags for you to ensure they are created correctly. One method creates a set of tabs for class days, either MWF or TTh, and another will create tabs with custom titles, one at a time.
Tab Tag Format
Opening tag (designates tab title/tab content to follow): {%:tab_title}
Tag content added here, between tags.
Closing tag (designates end of tab content): {%)
Adding pre-formatted day tabs
When adding weekly content in either a Label, Page, or a Section summary, there are pre-formatted tabs for organizing information according to each day's class session. To do this, either add a Label or Page (click Add an activity or resource) to your section, or edit the section itself. In the toolbar of the text editor, there is an icon on the top that looks like a page and says Templates4U when you hover over it. Clicking on the icon will provide a few options for tab templates:

- MWF_Tabs will generate tabs for Monday, Wednesday, and Friday.
- TTh_Tabs will generate tabs for Tuesday and Thursday.

After selecting your chosen tab format, you will place your content in-between the code that will be displayed in the text box. You will see day's content in between two sets of curly braces.This is where you will place the content for that tab. Tabs may contain any content that you would normally place in a text block (other than more tab sets). If you wish to rename the tab, simply replace the text (e.g. Monday) after the colon and before the ending brace.

Additional text, images or videos may be added before or after the tab set, and this content will appear either above or below the tabs. You can not add multiple tab sets (i.e. two tab sets with text between them) to a single text block. After clicking Save changes, the tabs and any additional content will appear in your text.

Note: Tab sets can be copied by selecting all of the text with the codes and pasting into the text editor or a new label, etc. You do not need to use the template button each time.
Adding custom manual tabs
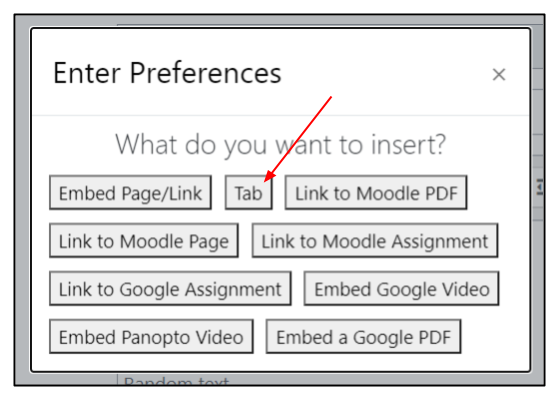
You may also create as many custom tabs as you wish using the Generico button in the text editor. Like the pre-formatted tabs, these can be added anywhere the text editor is visible.To do so, look for the G button in the first row of the editor menu and click to open up a chooser menu.

From this menu, select Tab, and enter the name or title for the tab, and select Insert.

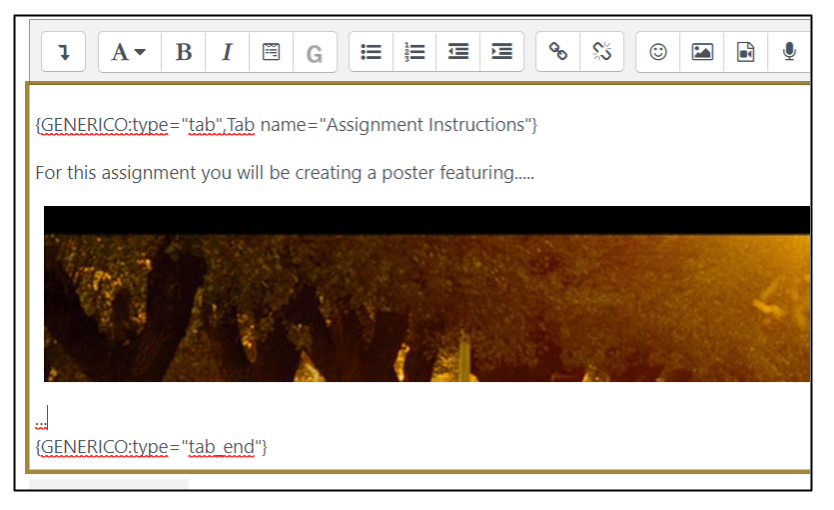
You will now see code in the text editor, which will be displayed as tabs when the page is viewed. Enter the content (text/images/links) for this tab in between the two codes that begin and end with curly braces. Tabs may contain any content that you would normally place in a text block (other than more tab sets). If you wish to alter the name of the tab, simply edit the text in the quotes after name=. To add additional tabs, simply repeat this process, setting your cursor at the end of the last tab before clicking on the G button. Alternatively, you may also copy a tab (everything from the starting curly brace of the opening code to the closing brace of the end code) and paste it after your last tab, and rename the new tab.

Additional text, images or videos may be added before or after the tab set, and this content will appear either above or below the tabs. You can not add multiple tab sets (i.e. two tab sets with text between them) to a single text block. After clicking Save changes, the tabs and any additional content will appear in your text.